Last updated: 04/17/15 01:30 pm EDT
Before You Begin
Purpose
This tutorial shows you how to rapidly create a database application using Oracle Application Express.
Time to Complete
Approximately 80 minutes.
Prerequisites
Before starting this tutorial, you should have:
- Perform the Manipulating Database Objects Using Application Express 5.0 tutorial.
Creating a Database Application
To create a database application with a few initial pages, perform the following steps:
-
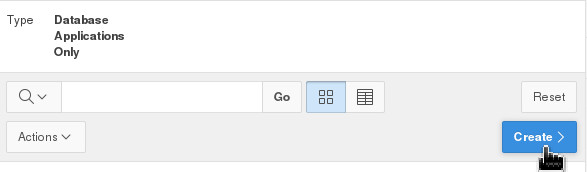
From the Oracle Application Express home page, click the down arrow next to Application Builder tab and select Applications > Database Applications.

-
Click Create >.
-
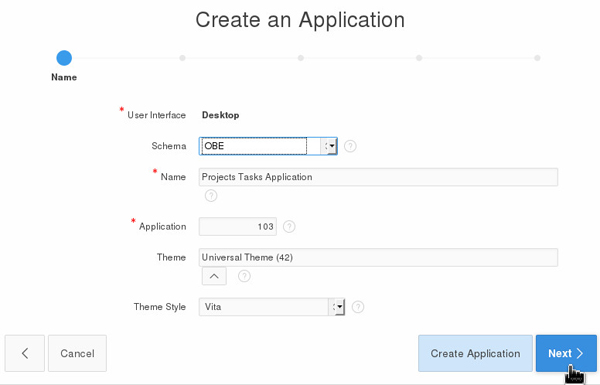
For Name, enter Project Tasks Application . Click Next >.
-
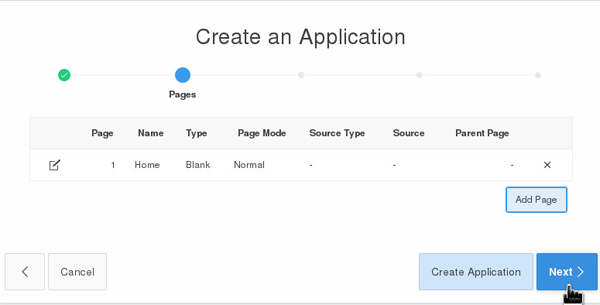
Click Next.
-
Click Next.

-
Slect DD-MON-YYYY for Date Format.

-
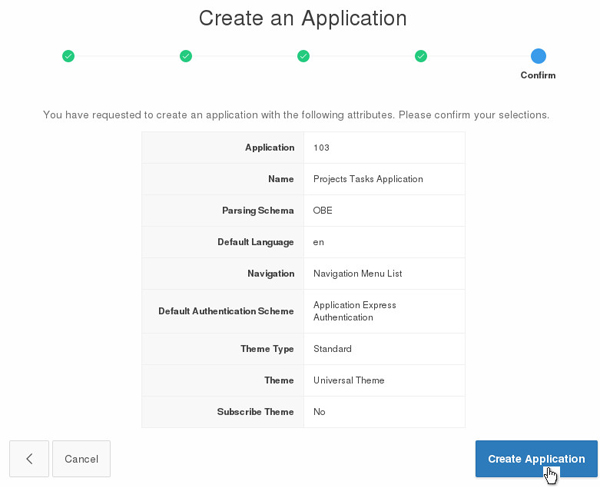
Click Create Application .
-
Click Create Page .

-
Click Form >Master Detail Form


-
On Create Master Detail window, Select OBE_PROJECTS for Table/View name. Click Next

-
For Show Only Related Tables select No. For Table/View name select OBE_TASKS. Move and select all columns . Click Next

-
For Master table > Primary Key Type choose Select Primary Key Column(s). Also for Detail table> Primary Key Type choose Select Primary Key Column(s). Click Next

-
For Primary Key Source choose Existing trigger . Click Next

-
For Primary Key Source choose Existing trigger . Click Next

-
For Master Row Navigation Order select PROJECT_ID . Click Next

-
Accept the default and click Next.

-
Click Next.

-
For Navigation Preference choose Create a new navigation menu entry. For Parent Navigation Menu Entry select Home. Click Next.

- Click Create
.

-
Your page was created successfully. Click Save and Run.

-
Enter OBE for
the Username and
OBE
for the
Password. Then click Login.

- A
report containing the list of projects is
automatically created. Select the Edit (
 )icon
next to one of the projects to view the Master
detail Form.
)icon
next to one of the projects to view the Master
detail Form.

- The Master Detail Form is shown. This page
allows a user to edit the details of the Project
as well as the details of the Tasks associated
with the Project. It also allows users to add
new tasks to the current project.
In the master region, you can use the backward(
 )and
forward (
)and
forward ( )buttons
to move to previous and next projects. For
example, if you have clicked the edit icon
next to the Public Website project in the
previous step, you see a backward button here.
)buttons
to move to previous and next projects. For
example, if you have clicked the edit icon
next to the Public Website project in the
previous step, you see a backward button here.In the detail region, you see an Add Row button. This button saves any pending changes and then adds another row so that a new task can be added to the project. You should also have a Delete Checked button. This button is used in conjunction with the check boxes to the left of each Task. When you click the Delete Checked button, any tasks that have been "checked" are deleted. If you use this feature, you notice that a deletion confirmation has been built in. This asks you to confirm your deletion before proceeding.
Change the name of the project and click Save.

Editing Application Objects
Although the Master-Detail form is fully functional, the presentation can be improved. In this topic you change the names of the Page Title, Region Title and change the format an item on the Master Report. Lastly, you change the sequence of items in the Projects and Tasks page using the Drag and Drop feature. Perform the following steps:
-
Click Edit Page 2.

-
In the Rendering section of the Page Designer, locate and expand Obe Projects > Columns node.

-
Click PROJECT_DEADLINE.

-
In the Column - Appearance section of the Page Designer, click Format Mask.

-
From the Pick Format Mask page, select 12-JAN-2004.

-
Click Save.

-
In the Rendering section, click Page 2: OBE_PROJECTS.

-
Change the Name and Title to PROJECTS.

-
Click Save and Run Page icon.

-
Click Quick Edit on the Developer toolbar.

-
Click Obe Projects.

-
You are taken to the Page Designer with Obe Projects selected. In the Rendering section notice that Obe Projects is selected.

-
In the Region section of Page Designer, change Title to PROJECTS and click Save.

-
Click Save and Run Page.

-
If you want to add help text for any item labels , Click Edit page3.

-
In the Page Rendering section of Page Designer, click P3_PROJECT.

-
In the Property Editor - Page Item section of Page Designer, click Edit in Modal button for Help property.

-
Change the Help Text to something else and click OK.

-
Click Save and Run Page.

-
Click ? next to Project label and notice that your help text is displayed.

-
You can reorder the items on your page. Click Edit Page 3.

-
The page definition for Page 3 is displayed. To reorder the sequencing of items in this page, you can drag and drop an item to a new location. Drag and drop the P3_PROJECT_PRIORITY item above the P3_PROJECT_ DEADLINE item and release your mouse.

-
Click Save.

-
Click Save and Run.

-
Note how the Project Priority field now appears above the Project Deadline field. Click the Application<n> link in the developer tool bar.

Creating List of Values(LOVs)
Another way to improve the presentation of the
application is to create a List of Values. In this
topic, you create the following LOVs:
| EMPLOYEES | A Dynamic LOV to show the list of Employees. This LOV is then associated with the Assigned To column in the List of Tasks. |
| STATUSES | A Static LOV to show the list of Statuses. This LOV is then associated with the Status column in the List of Tasks. |
| PRIORITIES | A Static LOV to show the list of Priorities. This LOV is then associated with the Priority column in the Projects Master area. |
-
Click the 3 - Master Detail page.

-
Click Shared Components icon in the Page Designer.

-
In the Shared Components page, click List of Values.

-
Click Create.

-
Select From Scratch and click Next >.

-
Enter EMPLOYEES for Name and select Dynamic for Type. Click Next >.

-
Click Create Dynamic List of Values link.

-
To select a Table, click the up arrow.

-
Select OBE_EMPLOYEES.

-
Click Next >.

-
Enter FIRST_NAME for Display Column and EMPLOYEE_ID for Return Value.

-
Concatenate LAST_NAME to the SQL statement for display value and click Finish. The first column in a dynamic list of values is the column displayed to the user. The second column is the corresponding value to be stored in the database. They can both be the same value when appropriate:
select FIRST_NAME||', '||LAST_NAME as display_value, EMPLOYEE_ID as return_value from OBE_EMPLOYEES order by 1.
-
Click Create List of Values.

-
Your LOV was created. You want to create 2 more static LOVs. Click Create >.

-
Select From Scratch and click Next >.

-
Enter STATUSES for Name and select Static for Type. Click Next >.

-
For Display Value and Return Value, enter the following:
Display Value Return Value Closed closed Open open On Hold on-hold
Click Create List of Values.
-
The STATUSES LOV was created. There is one more LOV to create for the Master portion of the form, Priorities. Click Create

-
Select From Scratch and click Next >.

-
Enter PRIORITIES for Name and select Static for Type. Click Next >.

-
For Display Value and Return Value, enter the following:
Display Value Return Value High 1 Medium 2 Low 3
Click Create List of Values.
-
Click Edit Page 3 icon.

-
In the Page Rendering section, under Obe Tasks, expand Columns.

-
Click ASSIGNED_TO.

-
In the Column section of Page Designer, select Type as Select List.

-
Scroll down the Property Editor and select Type for List of Values as Shared Component.

-
Select List of Values as EMPLOYEES.

-
Click Save.

-
In the Rendering section, click STATUS under Obe Tasks.

-
In the Column section of Page Designer, select Type as Radio Group.

-
Scroll down the Property Editor and select Type for List of Values as Shared Component.

-
Select List of Values as STATUSES.

-
Click Save.

-
Click Save and Run Page.

-
Select the drop down list for Assigned To. You see that the dynamic LOV executed and the list of Employees is shown.

-
Next, you need to assign the the PRIORITIES LOV to the Priority item in the Master area of the page. Click Edit Page 3.

-
In the Page Rendering section, click P3_PROJECT_PRIORITY under Obe Tasks.

-
In the Property Editor - Page Item section of Page Designer, select Type as Radio Group.

-
Scroll down the Property Editor and select Type for List of Values as Shared Component and select List of Values as PRIORITIES.

-
Click Save and Run Page.

-
The Priority field is now a Radiogroup populated with the LOV values. Click Edit Page 3 in the Developer links.

Adding an Item Validation
You don't want a user entering a date prior to
today's date. This type of check can be done through
an item validation. Perform the following steps:
-
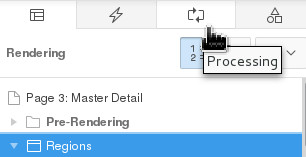
In the Page Designer section for Page 3, click Processing.
-
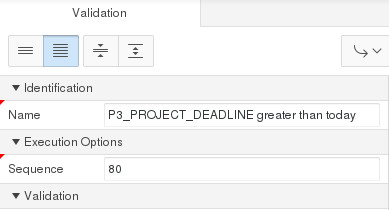
Right-click Validations and select Create Validation.

-
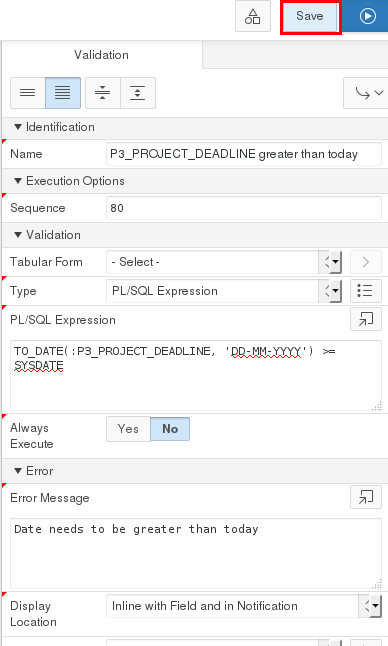
In the Validation section, enter P3_PROJECT_DEADLINE greater than today as Validation Name. Select PL/SQL Expression for Type.
-
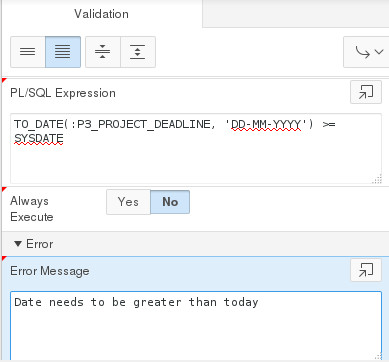
Enter TO_DATE(:P3_PROJECT_DEADLINE,'DD-MM-YYYY') >= SYSDATE for the PL/SQL Expression and Date needs to be greater than today for the Error Message.
-
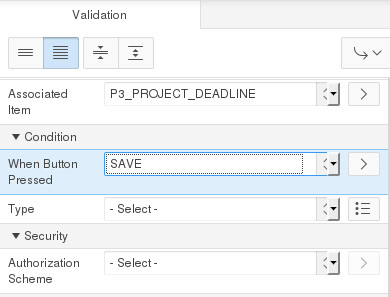
Select the item P3_PROJECT_DEADLINE for the Associated Item. Then select SAVE for When Button Pressed.
-
Click Save.
-
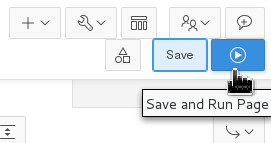
Click Run.
-
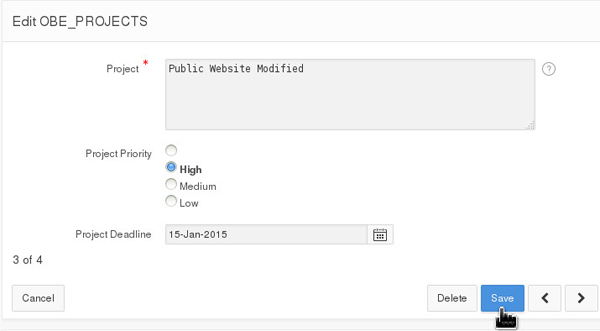
Change the date to something prior to today's date and click Save.
-
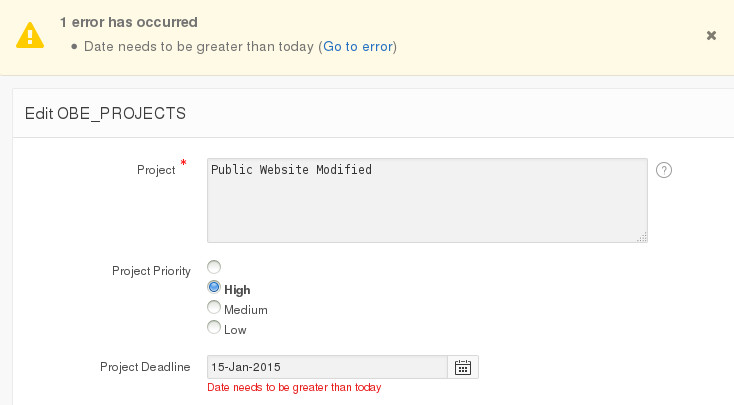
Notice that you receive an item (or field) error message as well as a page notification message. This is because you specified that you wanted both when you created the validation.
-
Click the Application<n>
link in the developer tool bar. 
Want to Learn More?
- Create a Database Application
- Edit Application Objects
- Create List of Values
- Add an Item Validation
Resources
- APEX OTN Home Page
- To learn more about Application Express 5.0, refer to additional OBEs in the Oracle Learning Library
- Oracle Application Express: Workshop I
- Oracle University
Credits
-
Lead Curriculum Developer: Dimpi Sarmah
-
Other Contributors:David Peake,Anupama Mandya